Aug 23, 2026 Choose Guiding
How to Polish an Engraved Metal Plaque | Kaiyubang
Learn how to polish an engraved metal plaque without losing fine details. Explore sanding, buffing, cleaning, and finishing methods for durable metal engraving.
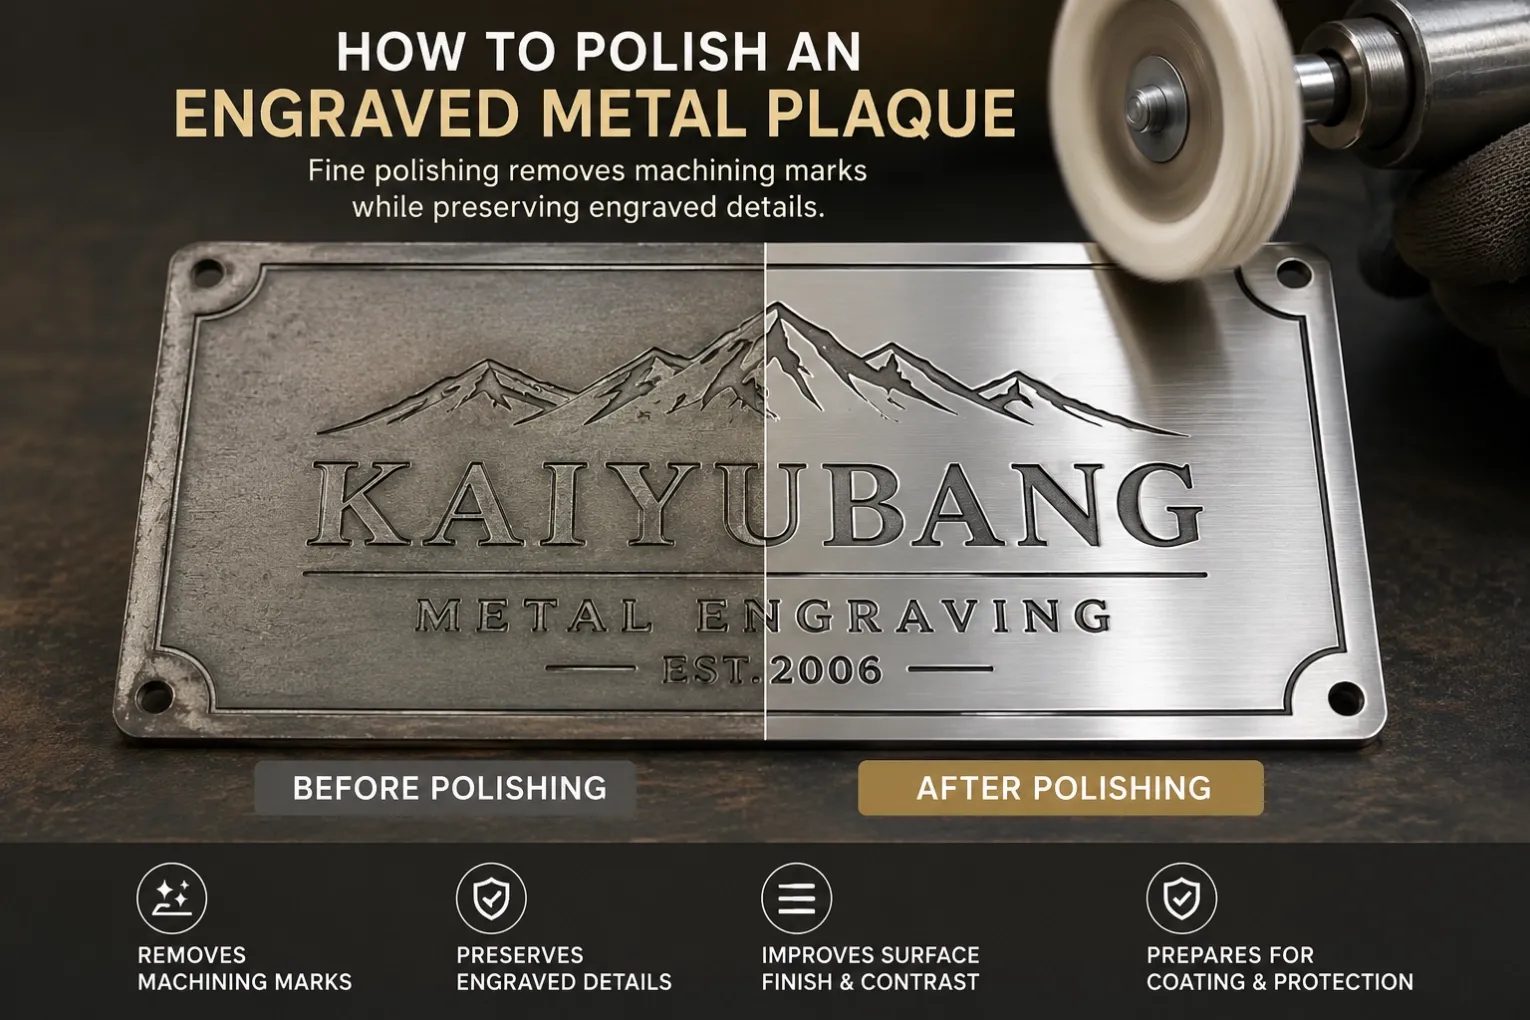
How to Polish an Engraved Metal Plaque | Kaiyubang
Meta Description:
Learn how to polish an engraved metal plaque correctly, from cleaning and sanding to buffing and protective finishing, while preserving fine engraved details.
Polishing is one of the most important finishing steps when producing an engraved metal plaque. The right polishing process removes machining marks, scratches, oxidation, and burrs while preserving engraved letters, patterns, portraits, and relief details.
However, polishing engraved metal is different from polishing an ordinary flat metal sheet. Too much pressure or an abrasive that is too aggressive can round sharp edges, reduce engraving depth, and even damage fine artwork.
At Kaiyubang, polishing is part of the complete custom engraved metal manufacturing process. Depending on the project, production may include CNC engraving, relief carving, deburring, sanding, polishing, welding, coloring, coating, and final inspection.
This guide explains how to polish metal engraving step by step and how the process changes for stainless steel, brass, bronze, copper, aluminum, small metal plaques, photo plaques, and outdoor applications.
Why Does an Engraved Metal Plaque Need Polishing?
After CNC engraving, etching, embossing, casting, cutting, or welding, the metal surface may contain:
- Machining lines
- Small burrs
- Surface scratches
- Oxidation
- Welding marks
- Uneven textures
- Metal particles
- Residue from previous processes
Professional polishing improves the appearance of a metal engraved plaque, but appearance is only part of its purpose.
A controlled finishing process can also prepare the surface for painting, coloring, clear coating, powder coating, or other protective treatments.
For a personalized metal plaque, this is particularly important because the finished product may contain small lettering, logos, decorative borders, house numbers, portraits, or detailed relief patterns.
The objective is therefore not simply:
“Make the metal shiny.”
The real objective is:
Remove unwanted surface defects while preserving the details that are supposed to remain.
Step 1: Identify the Metal Before Polishing
Different metals respond differently to sanding and polishing. Before choosing an abrasive, wheel, compound, or polishing speed, first identify the material.
Stainless Steel Engraved Plaques
Stainless steel is widely used for architectural signs, address plaques metal, corporate plaques, room signs, and metal plaques for outdoors.
Depending on the design, stainless steel can have:
- Brushed finish
- Satin finish
- Bright finish
- Mirror finish
- Directional grain
The polishing sequence should match the required final appearance.
According to the stainless steel surface treatment guide from worldstainless, mechanical finishing methods are used to create different decorative stainless steel surfaces. This is why the required surface specification should ideally be determined before final polishing.
Brass and Bronze Plaques
Brass and bronze are popular materials for:
- Architectural plaques
- Memorial plaques
- Historical markers
- Hotel signs
- Building plaques
- Decorative nameplates
Instead of polishing every area to the same brightness, manufacturers can combine dark recessed areas with brighter raised lettering or borders.
This contrast is particularly effective on an embossed plaque, because polishing the raised areas can visually increase the depth of the design.
Aluminum Nameplates
Aluminum is lighter and softer than many stainless steels.
It is frequently used for etched metal nameplates, equipment labels, signs, and lightweight identification plates.
Because the material is relatively soft, excessive sanding pressure can remove material quickly. Controlled pressure is therefore especially important.
Copper Plaques
Copper can be polished to create a warm, reflective surface, but its appearance naturally changes as oxidation develops.
Depending on the required design, polished copper may receive additional protective treatment to slow surface changes.
Step 2: Clean Metal Engraving Before Polishing
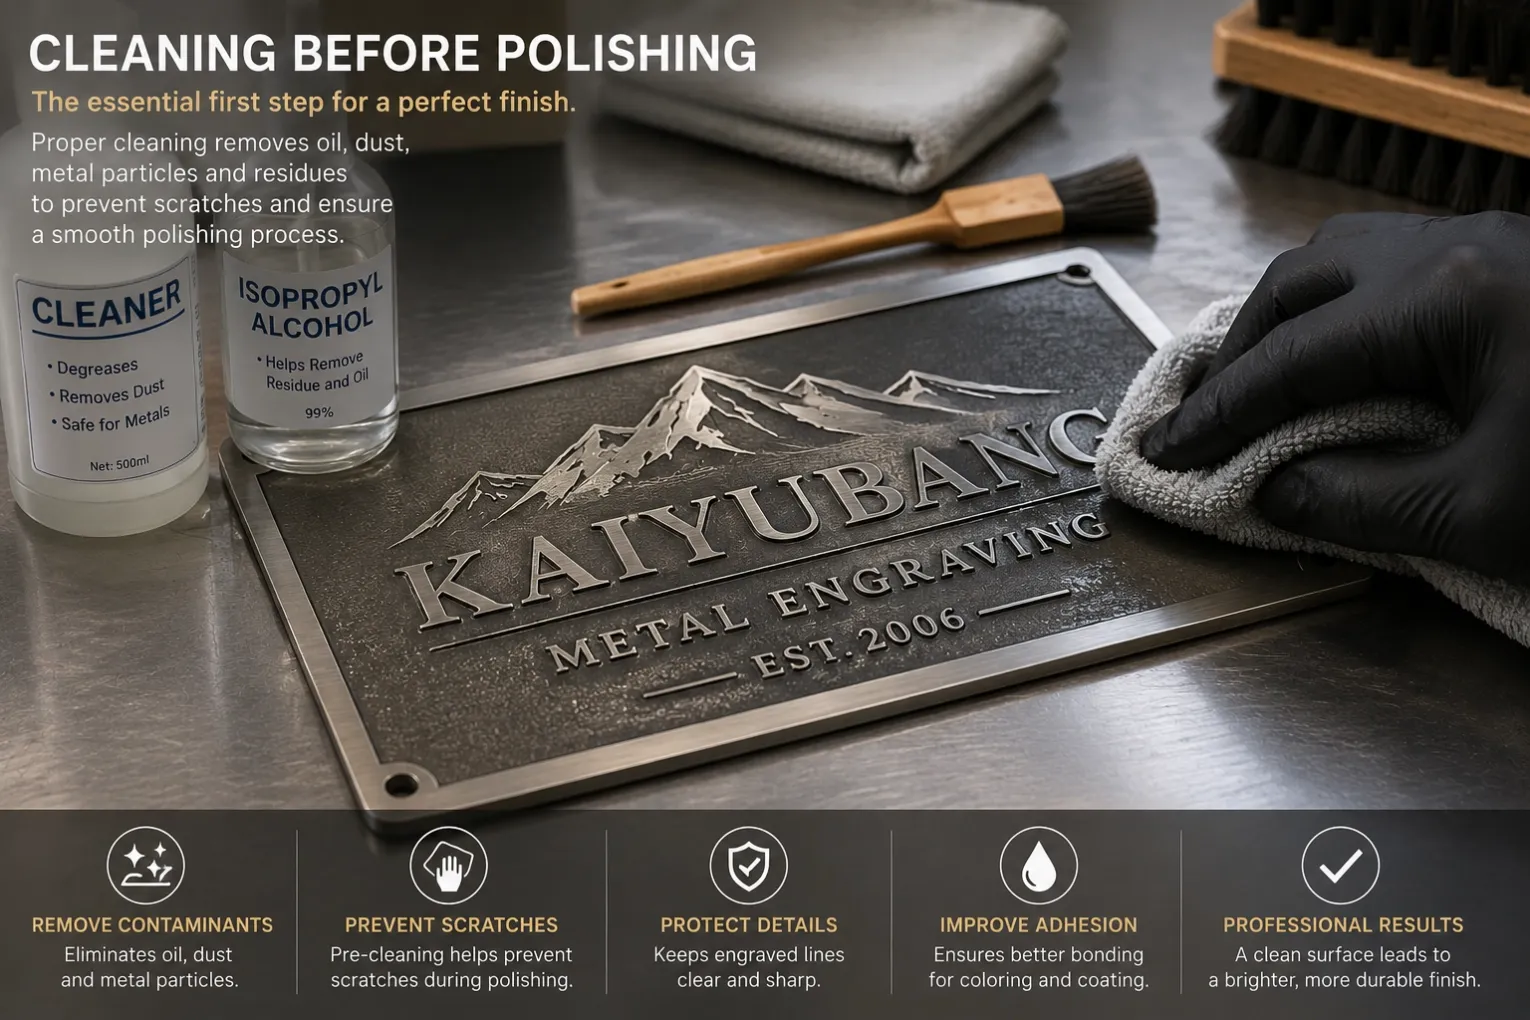
Image:
cleaning-metal-engraving-before-polishing.webpNever begin precision polishing on a dirty surface.
Before sanding or buffing, remove:
- Oil
- Dust
- Metal particles
- Fingerprints
- Adhesive residue
- Previous polishing residue
- Other surface contamination
Loose particles trapped between the abrasive and the plaque can produce new scratches.
For custom etched metal nameplates and fine etched plaques, cleaning is particularly important because small recessed lines can trap residue.
After cleaning, inspect the surface under good lighting before moving to the next step.
Step 3: Remove Burrs Without Destroying Engraved Details
Fresh CNC engraving can leave small burrs around:
- Letters
- Borders
- Corners
- Mounting holes
- Logos
- Decorative patterns
These imperfections should be removed before fine polishing.
However, aggressive grinding can create another problem: it can soften the sharp edges of the engraving.
This is especially important when producing an engraved small plaque or small engraved plaque. Because the letters and patterns are small, even minor material removal may noticeably change their appearance.
For controlled deburring:
- Start with the least aggressive method that can remove the defect.
- Apply light, even pressure.
- Keep the abrasive moving.
- Avoid repeatedly grinding the same small area.
- Inspect engraved edges frequently.
For small plaque engraving, manual finishing or smaller tools may offer better control around fine letters and narrow recessed areas.
Step 4: Sand the Metal Plaque From Coarse to Fine
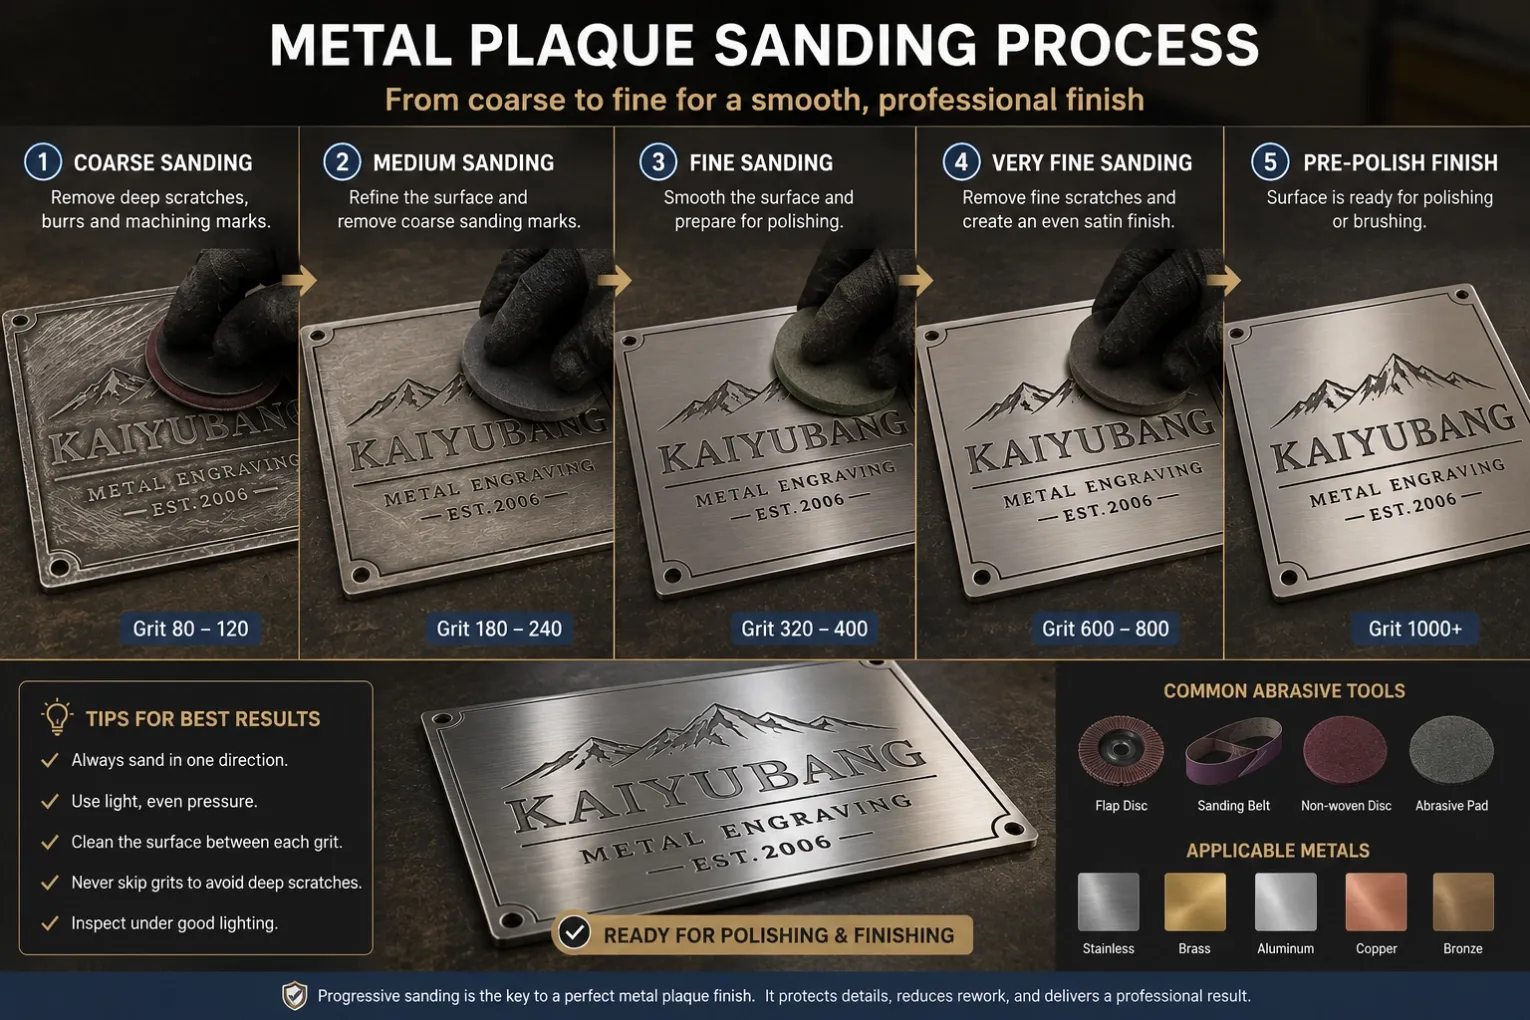
Image:
metal-plaque-sanding-process.webpOne of the biggest mistakes in metal finishing is trying to move directly from a rough surface to final polishing.
A professional surface is normally created progressively:
Surface Correction → Intermediate Sanding → Fine Sanding → Pre-Polishing → Final Polishing
Each stage should remove or refine the scratch pattern created by the previous stage.
For example, if deep machining marks remain on engraving plates for plaques, applying a very fine polishing compound will not automatically eliminate them.
The surface first needs to be progressively refined.
The exact abrasive sequence depends on:
- Metal type
- Starting surface condition
- Engraving depth
- Desired finish
- Size of the plaque
- Final application
Do not assume that one grit sequence is suitable for every engraved plates for plaques project.
Step 5: Protect Fine Engraving During Sanding
An engraved plaque is not a uniform flat surface.
It may contain three-dimensional areas that react differently to abrasives.
Flat Background Areas
These areas can normally tolerate more consistent mechanical finishing.
Raised Letters and Borders
Raised details receive abrasive contact first, so excessive sanding can round their edges.
Recessed Engraving
Deep grooves may require small tools, brushes, felt wheels, or controlled hand finishing.
Fine Text
Small lettering requires lower pressure because readability depends on maintaining sharp edges.
Relief Artwork
An embossed plaque may contain several different height levels. Polishing everything with the same pressure can reduce the visual depth of the design.
The polishing process should therefore follow the geometry of the artwork rather than treating the entire plaque as a flat metal sheet.
How to Polish an Engraved Photo Plaque Without Losing Detail
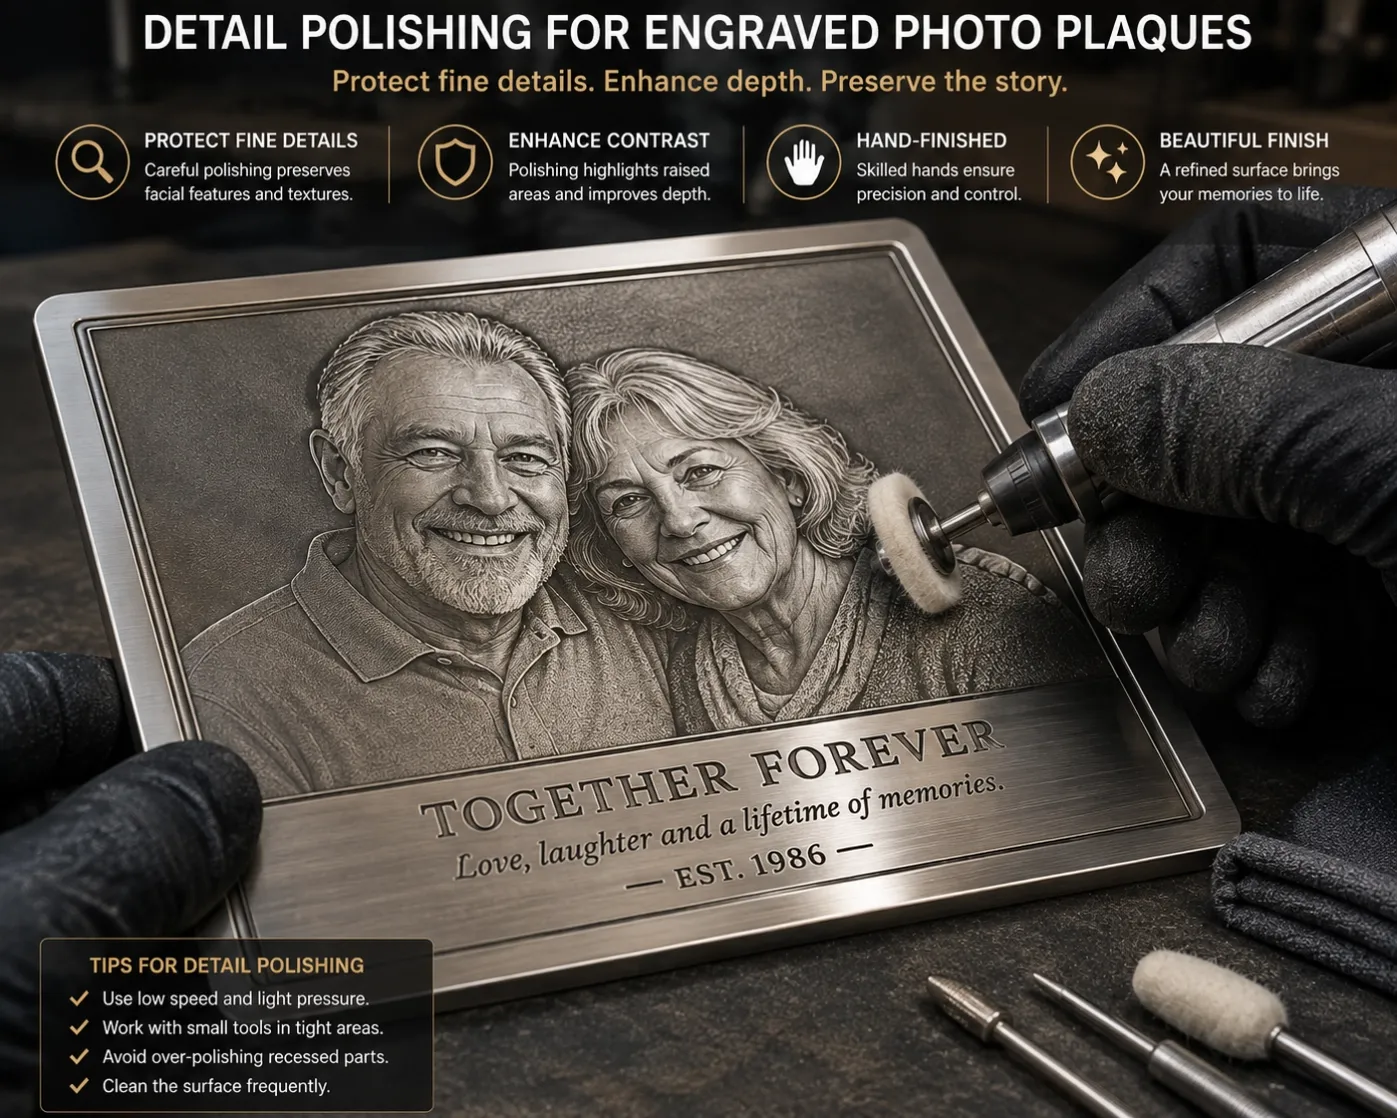
Image:
engraved-photo-plaque-detail-polishing.webpAn engraved photo plaque requires even greater control.
A portrait may use very small variations in engraved depth and texture to represent:
- Eyes
- Hair
- Skin texture
- Clothing
- Shadows
- Facial contours
- Background elements
Aggressive polishing can flatten these subtle differences.
For picture plaque engraving, a safer workflow is:
- Remove only necessary burrs.
- Refine surrounding areas progressively.
- Reduce pressure near facial features.
- Use smaller finishing tools for detailed areas.
- Avoid excessive polishing inside shallow recesses.
- Clean the surface frequently.
- Inspect the image under directional light.
The objective is to enhance the metal surface without removing the visual information created during engraving.
For another example of how an engraved plaque can support artwork presentation, see Kaiyubang's engraved metal plaque for artwork project, where a custom plaque was created as part of an exhibition display.
Step 6: Polish the Engraved Metal Plaque
Image:
metal-engraving-polishing-wheel.webpAfter the sanding marks have been progressively refined, the plaque can move to polishing and buffing.
Depending on the material and finish, manufacturers may use:
- Polishing wheels
- Felt wheels
- Abrasive belts
- Fine abrasive discs
- Non-woven abrasives
- Buffing compounds
- Small rotary tools
- Hand-polishing tools
Professional metal polishing abrasives and finishing systems are available in different forms for grinding, blending, finishing, and polishing metal surfaces.
The tool itself, however, does not guarantee a good result.
The operator must also control:
Pressure + Speed + Abrasive + Direction + Contact Time
This becomes particularly important around engraved letters.
A polishing wheel that remains in one position for too long can gradually soften edges and reduce definition.
Step 7: Choose the Correct Metal Plaque Finish
Not every metal engraved plaque should have a mirror finish.
The best surface depends on where the plaque will be used and what visual effect the designer wants.
Mirror Polished Finish
A highly reflective finish can create a premium appearance on selected stainless steel and decorative applications.
It works particularly well when strong reflection is intentionally part of the design.
Satin Finish
A satin surface produces softer reflections.
It is often suitable for:
- Architectural signage
- Corporate plaques
- Hotel signs
- Office nameplates
Brushed Finish
A brushed finish creates a visible directional grain.
It is widely used for contemporary signs and metal name plates engraved with clean typography.
Antique Finish
Antique treatments are especially suitable for brass, bronze, and copper.
Dark recessed areas can be combined with polished raised areas to emphasize lettering and relief depth.
Selective Polishing
Selective polishing means polishing only specific areas, such as:
- Raised lettering
- Borders
- Logos
- Relief highlights
- Decorative patterns
This technique can create stronger visual contrast than polishing the entire surface equally.
Step 8: Clean the Plaque After Polishing
Polishing can leave:
- Compound residue
- Fine metal dust
- Oil
- Abrasive particles
These contaminants should be removed before painting, coloring, or coating.
This stage is particularly important when producing etched metal nameplates with filled lettering because residue inside recessed areas may affect the next finishing process.
After cleaning, inspect the plaque for:
- Remaining scratches
- Uneven polishing
- Damaged engraving
- Residue in recessed areas
- Inconsistent grain direction
Only after the surface passes inspection should it proceed to the next finishing stage.
Step 9: Coloring and Protective Finishing
Polishing is often not the final manufacturing process.
For many custom engraved metal products, the complete workflow may look like:
Artwork → Material Preparation → CNC Engraving → Deburring → Sanding → Polishing → Cleaning → Coloring → Protective Finish → Inspection
Different designs require different treatments.
For example:
Recessed Color Filling
Engraved letters or patterns can receive paint while the surrounding metal remains polished.
Hand-Painted Relief
Different areas of a relief plaque can be manually colored to increase depth and visual detail.
Clear Protective Coating
Selected metals may receive a transparent protective layer after finishing.
Powder Coating
Suitable metal products can receive a colored protective coating depending on the application and design.
Finishing should therefore be considered during the design stage rather than after engraving has already been completed.
How to Finish Metal Plaques for Outdoors
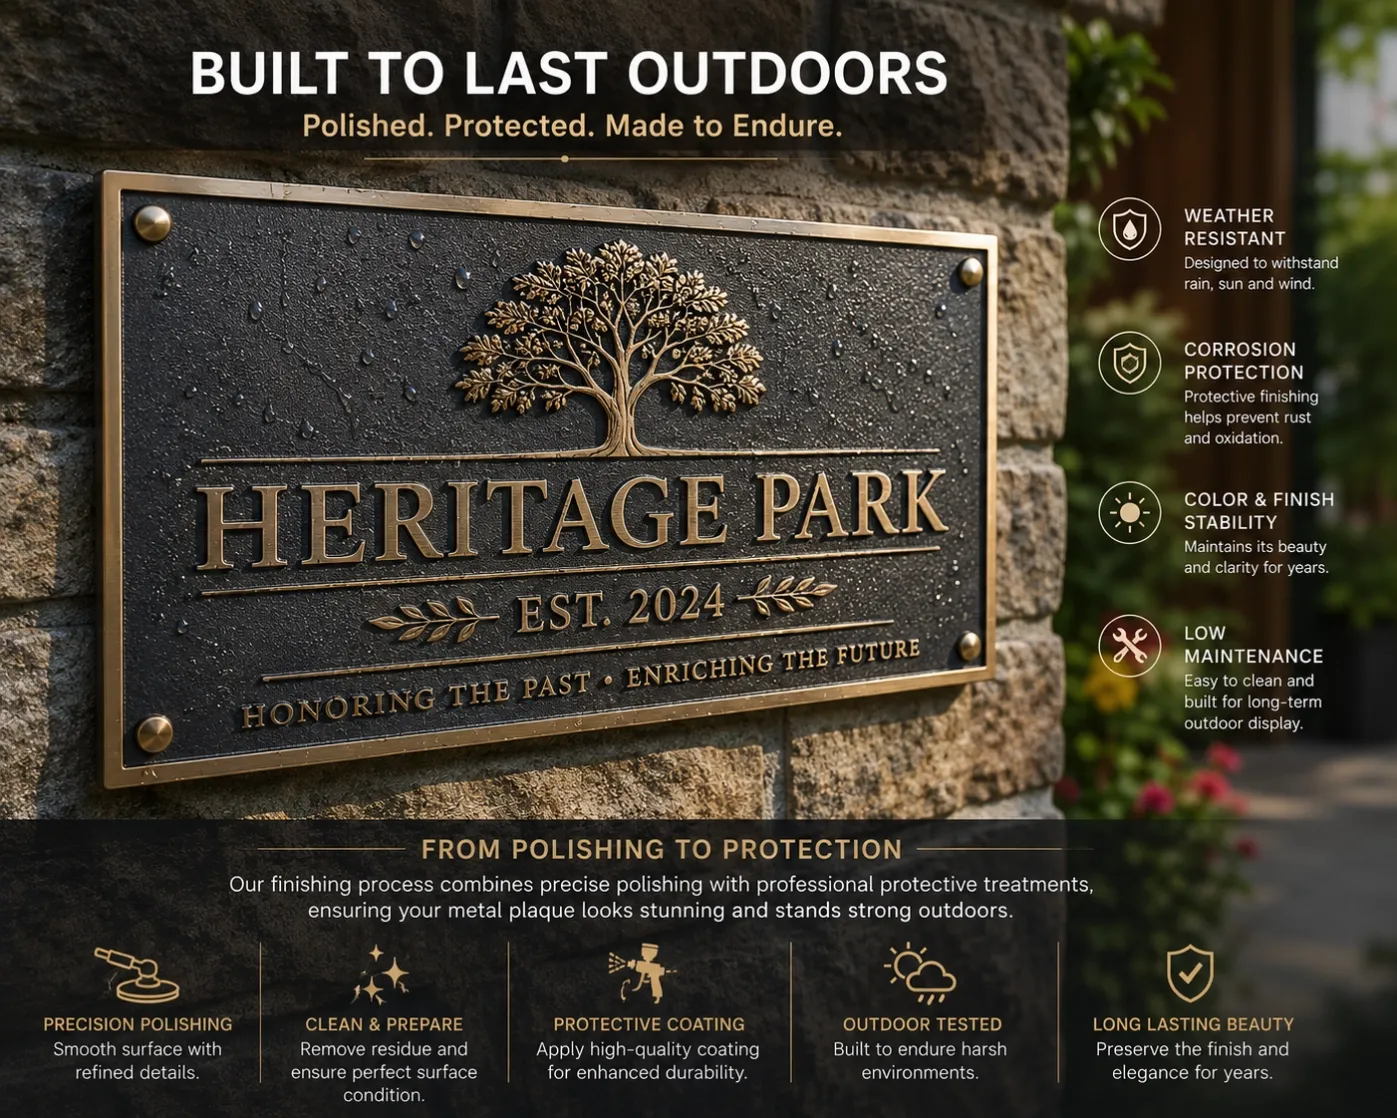
Image:
outdoor-metal-plaque-finished-surface.webpOutdoor plaques face more demanding conditions than indoor signs.
Rain, moisture, sunlight, temperature changes, airborne contamination, and installation environment can all influence long-term appearance.
A metal plaques for outdoors project therefore requires more than a visually attractive polished surface.
Depending on the material and application, the production process may include:
- Appropriate material selection
- Surface preparation
- Controlled polishing
- Painting
- Clear coating
- Powder coating
- Corrosion-resistant finishing
- Suitable outdoor mounting hardware
For example, Kaiyubang's custom villa house-number plaque collection includes metal signs designed for exterior walls, villa entrances, gates, and outdoor architectural applications.
A polished surface alone should not automatically be considered corrosion protection.
The material, surface treatment, environment, and maintenance requirements must be considered together.
Small Metal Plaques Require More Precision, Not Less
It is easy to assume that small metal plaques are easier to manufacture because they use less material.
In reality, small plaques can require extremely careful finishing.
Imagine a 50 mm plaque containing:
- A logo
- Three lines of text
- A border
- Mounting holes
A polishing wheel only needs to remove a very small amount of material before the appearance of those details begins to change.
Therefore, an engraved small plaque may require more hand finishing and inspection than a much larger plaque with simple lettering.
This is why small plaque engraving should be evaluated according to detail density, not simply physical dimensions.
Common Metal Engraving Polishing Mistakes
1. Applying Too Much Pressure
More pressure does not automatically produce a better finish.
It can create heat, uneven surfaces, rounded edges, and loss of detail.
2. Skipping Abrasive Stages
Moving from a coarse abrasive directly to a very fine polishing compound may leave deep scratches visible.
3. Using One Process for Every Metal
Stainless steel, aluminum, brass, bronze, and copper have different finishing characteristics.
4. Over-Polishing Fine Engraving
Fine lines and shallow engraving can lose definition if too much material is removed.
5. Ignoring Grain Direction
For brushed or satin surfaces, inconsistent sanding direction can create an uneven appearance.
6. Forgetting the Final Environment
A beautiful indoor finish may not be appropriate for an outdoor plaque.
7. Treating Polishing as the Final Step
If the plaque still needs coloring, coating, or painting, polishing must prepare the surface for those later processes.
Engraved vs. Etched vs. Embossed Plaques: Does Polishing Differ?
Yes.
Engraved Plaques
Material is mechanically removed to create recessed letters or designs. Polishing must protect the edges and depth of the engraving.
Etched Plaques
Chemical or other etching processes create recessed designs. Because some etched details can be relatively shallow, excessive polishing should be avoided.
Embossed Plaques
Raised and recessed areas create a three-dimensional surface. Selective polishing can be used to highlight raised details.
Therefore, etched plaques, engraved plaques, and embossed plaques should not automatically receive identical finishing processes.
The manufacturing method should influence the polishing strategy.
How to Evaluate Engraved Plaques Online
Customers searching for engraved plaques online often compare products mainly by appearance and price.
However, photographs do not always reveal the quality of the finishing process.
Before ordering, ask the manufacturer about:
- Base metal
- Material thickness
- Engraving method
- Engraving depth
- Surface finish
- Outdoor protection
- Coloring method
- Mounting method
- Production lead time
For custom etched metal nameplates, also confirm the required text size, line thickness, finish, and installation environment.
For outdoor plaques, ask specifically how the surface will be protected after engraving and polishing.
How Do You Know When a Metal Plaque Is Properly Polished?
A finished plaque should be inspected under good lighting from several angles.
Look for:
- Consistent surface texture
- Clean engraved lines
- Sharp lettering
- No unwanted deep scratches
- No polishing residue
- Uniform brushed direction where required
- Preserved relief details
- Clean edges and mounting holes
For a small engraved plaque, inspect the lettering at close range.
For a large architectural plaque, also inspect it from the expected viewing distance.
Both perspectives matter.
FAQ About Polishing Metal Engraving
Can You Polish an Engraved Metal Plaque?
Yes. An engraved metal plaque can be polished, but the polishing method should be selected according to the material, engraving depth, surface condition, and desired finish.
Can Etched Plaques Be Polished?
Yes, but etched plaques may contain relatively shallow details. Aggressive polishing can reduce their visibility, so controlled finishing is important.
Can an Engraved Photo Plaque Be Polished?
Yes. An engraved photo plaque should be polished carefully, particularly around facial features and fine textures.
Can Small Engraved Plaques Be Machine Polished?
Yes, but some small engraved plaque designs benefit from hand finishing around letters, borders, and recessed areas.
What Finish Is Best for Outdoor Metal Plaques?
There is no single best finish. Material, climate, appearance, installation environment, and maintenance requirements should all be considered.
Should Metal Be Polished Before or After Engraving?
Both can be part of the process. The raw material may receive preliminary surface preparation before engraving, followed by deburring, refinement, and final polishing after engraving.
Final Thoughts: Good Polishing Protects the Engraving
The best polishing process is not necessarily the one that produces the brightest metal.
It is the process that creates the required finish while preserving the original engraving.
Whether you are manufacturing engraving plates for plaques, a personalized metal plaque, an engraved photo plaque, etched metal nameplates, an embossed plaque, or outdoor architectural signage, polishing should be planned according to the material, engraving depth, surface design, and final application.
Kaiyubang manufactures custom metal engraving products using processes that can include engraving, relief work, sanding, polishing, welding, coloring, and protective finishing.
If you are developing a personalized metal plaque and are unsure which material, engraving process, or surface finish is appropriate, send your artwork, dimensions, material preference, thickness, quantity, and installation environment for evaluation.